- Why Make Homemade Yogurt?
- How Much Time Does It Take to Make Homemade Yogurt?
- How Complicated Is It?
- How to Make Homemade Yogurt, the Easy Way
- What Does It Look Like?
- The Easy Clean Up
- Serving Suggestions
- A Note on Skim vs. Whole Milk
- A Note on Organic Milk
- Safety Notes
- Yogurt Troubleshooting
- Who Should Make Their Own Yogurt?
- Yogurt Excuses
- Need More Baby Steps?
It might sound scary, but making homemade yogurt is quite simple! I’ll give you step-by-step instructions and a yogurt troubleshooting guide to make sure you have yogurt success!

It’s a Choose Your Own Adventure Monday Mission today…Find your yogurt profile below, and take one (maybe two?) step forward.
- I don’t eat yogurt…Your challenge is to try to find some way to eat yogurt that you like! I found that starting with a plain vanilla worked for me. Put your favorite breakfast cereal on top if you have to – the yogurt is even healthier than the milk you’d usually use. Check out the serving suggestions below the recipe for other ways to incorporate yogurt into your meal planning.
- I eat run-of-the-mill sweetened yogurt cups…Try buying a 32 oz. tub of yogurt…you’ll save money and have less packaging waste to recycle.
- I buy big tubs of vanilla yogurt…Move on to plain yogurt, and use fresh or frozen fruit and your own sweetener. You’ll find that you can probably use less total sugar than the presweetened storebought brands. You might even try honey or real maple syrup to avoid refined sugar.
- I use plain yogurt and add fresh fruit…You’re ready to make your own, baby! Move on to the directions…
Yogurt is a foundational Kitchen Stewardship® recipe because it saves SO much money, improves your nutrition SO much and really is quite easy. (Broth is the first.) I think everyone should make homemade yogurt! You can even make Instant Pot yogurt.
NOTE: Yogurt recipe ideas and 30 other Healthy Snacks to Go recipes now available as an eBook!
[yellowbox]

If taking real food on the go is a challenge for you, you’re not alone.
Join thousands of other happy owners of Healthy Snacks to Go, an eBook that is helping real foodies everywhere keep their families nourished (and kids happy) even when they need to pack a snack — without resorting to processed junk food or expensive health food store treats.
With over a dozen different “bar” recipes alone, including many that are grain-free and contain zero refined sugar, I guarantee you’ll find a new family favorite in Healthy Snacks to Go.
[/yellowbox]

Why Make Homemade Yogurt?
I’ll bet a lot of people are apprehensive about making homemade yogurt for a variety of reasons:
- too much time
- too complicated
- afraid it won’t work out
- growing bacteria just sounds scary and dangerous
My job is to dispel all your fears and teach the no dishes, no fuss way to make homemade yogurt. Here’s your motivation:
- At current prices of $2-6/gallon for milk and $2-4 per 32 oz. tub of plain yogurt, I save $6-14 every time I make a gallon of yogurt, which I do almost every week. That’s over $700 a year off my food budget just by making homemade yogurt, about 1.5 gallons per week. (Yes, we eat it that often.) More if organic! Click HERE for the breakdown and more budget tips.
- Nutritionally, I can be totally in charge of the ingredients. No high fructose corn syrup or fake foods for my family. Just the health benefits of yogurt, thank you!
- Environmentally, I save about 200 32 oz. plastic tubs from going into landfills or being recycled every year.
- If you compare to the little plastic presweetened cups, the savings are immeasurably greater in every category.
 For example, the last time I read the nutrition facts on a 6 oz. yogurt cup, it contained about 45 grams of sugar. One teaspoon of sugar has 4 grams, and an 8 oz cup of milk has 12. I don’t think I could add enough fruit to make 45, so I guarantee you can cut your sugar intake…significantly…by using plain yogurt!

How Much Time Does It Take to Make Homemade Yogurt?
Grand Total: 15 minutes active work, an hour and a half that you’ll need to be at home.
- 5 minutes to pour milk into jars
- a few minutes over the next 20 minutes to check on the temperature
- a few minutes to move the jars to cool them
- wait an hour and a half or more
- 5 minutes to stir in the starter and put them to incubate
- a few minutes to get the jars in the freezer and then the fridge
How Complicated Is It?
The basic steps:
- Heat to sterilize the milk. (185 degrees)
- Cool milk to proper incubation temperature. (90-110 degrees)
- Add starter yogurt.
- Incubate at warm temperature 4-24 hours.
**If you have raw milk and want to make raw yogurt, click HERE.
Let’s get started. There are a bunch of ways to do this, but here’s the easiest method, in my opinion. I realize this post looks very long, but it’s just because I want to hold your hand through every step to take the fear out of the process, which is really simple once you read through this and try it once.
[purplebox]Hear ye, hear ye, visual learners! I have a video of this super simple, no dishes homemade yogurt method as a guest lecture in the GNOWFGLINS Cultured Dairy & Cheesemaking eCourse. Enrollment is open continually and the yogurt lesson is up mid-March. You can view all 40+ weeks of past courses as well! Click HERE for more info.[/purplebox]
[yellowbox]I also created an update with more photos and streamlined steps. Here’s the new homemade yogurt picture tutorial along with a yogurt troubleshooting guide![/yellowbox]
Supplies necessary:
- Glass jars (quart wide mouth canning jars or empty mayo or spaghetti sauce jars work great)
- Milk (any, from skim to whole)
- Candy thermometer, but I can show you how to do it without one too
- Pot large enough to hold your glass jars
- 2 Tbs of plain yogurt per quart of milk (Buy the freshest yogurt possible at a store and make sure it has “live and active cultures”. I prefer Dannon. I know it has the three top cultures that I’m looking for to help the gut. The little cups are often on sale for 40-50 cents.)
- picnic cooler
- bath/beach towel
- timer
Prep:
- Run jars and lids through the dishwasher to sterilize. They should be totally dry before capping. I let them air dry completely on top of my toaster oven. If you’re a real baby stepper, just put this step on your to-do list for this week, along with “print and read yogurt directions”. Then NEXT week you can tackle “make yogurt” on a day of your choosing! {As long as your jars have been thoroughly cleaned, absolutely completely dried out, and then capped, I wouldn’t worry too much about the bacteria…but don’t take my word on it.}
- Get out picnic cooler and clean bath towel.
How to Make Homemade Yogurt, the Easy Way
The very first time you make yogurt will take a little more attention because you’ll have to check temperatures to figure out the timing. After that, it’s a piece of cake!
- Put your sink washcloth in the bottom of the pot. This will prevent the jars from breaking if they start shaking when the water boils (especially if you forget about them). Added bonus: You know how sometimes even after washing your dishrag, it still smells sour? This will knock the stink right out!
- Pour milk into your jars to about an inch from the top.
- Place jars into the pot and fill the pot with tap water around the jars.
- Put a candy thermometer on the edge of the pot. Heat on high until boiling (now your thermometer is sterilized). Sometimes I put a spoon in there too so I know it’s sterile for stirring the yogurt starter in.
- Move the thermometer into one of the jars; turn heat to medium-low or so, just enough to keep the water boiling.
- When the milk is at about 185 (you can’t burn it with this method, so if you forget it for a while, it’s OK!) turn off the heat and put lids on the jars.
The no-thermometer method: When a “skin” appears on the top, you’re at temp. Just scoop the skin off and throw it in the sink. - Remove the jars of milk to cool in the refrigerator on the counter. {I used to cool jars in the fridge, but I realized that it was raising the temp of my fridge, and that’s not good for the rest of my food!} Optional: Take starter yogurt out and let it sit on the counter. This ensures that it’s not too cold when you mix it into the warm milk. You can also cool the milk in a sinkful of cold water with ice or ice packs if you’re in a hurry. It works in about 20-30 minutes with water just halfway up the sides of the jars at my house. {In the winter, I put the jars in my cold garage.}
- Put a lid on your pot of boiling water and arrange the towel in the cooler so you can put the pot in there without melting anything, then close the lid, towel, and all.
- Your goal is to get the milk down to about 100 degrees. Incubation happens between 90-120 degrees, so you have decent wiggle room, but 100-112 is optimal. At my house, it takes at least 90 minutes on the counter, 50 minutes in the fridge, 20 in the sink. The first few times you make yogurt, you’ll figure out what your fridge can do. Keep your thermometer sterile and check after about 45 minutes, or leave the thermometer in the jar for the first time only and check at intervals, keeping in mind that opening the fridge will change the temperature in there just a bit, so adjust next time when you simply set the timer. I’ve found that I prefer the thickness of the yogurt better at ~100 degrees.
No-thermometer method: You can learn what the jars feel like from the outside. I’ve found that I can’t hold onto the jars with bare hands for more than a few seconds, it’s still too hot. Give it 5-10 more minutes and check again. 118 degrees is the temp at which enzymes and yogurt bacteria die. It’s also the temp at which humans say “ouch!” God built in a way for us to know when our food is too hot for our health! Another way to check the temp of the milk is to use a clean spoon and drip a bit onto your wrist. You want it to feel warm, but not painful. Remember that your body temperature is about 98, and your goal is approximately 10 degrees higher. If you do have a thermometer, I would recommend the first few times to use it and your wrist so that you know what 110 feels like for future reference.*If you miss and it gets too cold, just heat it up again in the pot on the stove. It’s just milk at this point, so you’re not out anything! - Stir in ~2 Tbs. plain yogurt for each quart of milk. Stir gently; remember that you’re dealing with living organisms and you don’t want to knock them senseless! More is not better; too much starter can make bad yogurt. Again, these living organisms need room to reproduce. If you ask too many to live together, it’s like making tenements, and living conditions aren’t as nice for your friendly bacteria!
- Get those lids on again and nestle your jars in the cooler next to the pot of hot water. Keep them wrapped in one-half of the towel and take the lid off the pot to let the heat out, then close the lid of the cooler to keep the heat in. Keep the cooler still, more or less. Jiggling will affect the consistency of the yogurt. Don’t let the kiddos “cooler-race” in the kitchen! If you have no room in your kitchen, put the cooler in another room and leave yourself a note to remind you when to take the yogurt out.
- You have to make a call on whether you check your yogurt temp every hour or so (you can add more boiling water to the pot if the temp is getting too low) or just let it go and see what happens. Keep in mind that again, when you open your cooler, you’re affecting the temperature. I would recommend leaving it alone, and as long as your cooler is tough enough to keep the heat in the first time, you will never have to babysit your yogurt. This is NOT rocket science!
- Incubate 4-24 hours. Shorter incubation makes sweeter yogurt, longer is more tart. Also, lower incubation temperature makes sweeter yogurt and higher makes it more tart. I’ve had good success between 4 and 8. I forgot it once when my goal was 4 hours and found I liked it better at 6. I forgot it once at 6 hours and found that 8 is fine, but I liked 6 better. More recently I read that after incubating a full 24 hours, almost all the lactose is eaten by the bacteria, making the yogurt extremely digestible. I tried leaving one jar for 24 hours, and it wasn’t too bad. I started shooting for about 16 hours for a while, but now since exploring a gluten sensitivity and Crohn’s related issues, all our yogurt incubates for 24 hours. Experiment to see what you prefer!
Note: If you incubate longer than 8 hours, I would recommend setting a teapot to boil and pouring the contents into your pot. For 24-hour-yogurt, I add boiling water before I go to bed and when I wake up in the morning. I’ve never “checked” on the temp of my yogurt – I prefer to leave it alone – and I’ve had no problems. - When the time is up, put the jars into the freezer for about an hour. This improves the texture. No room in the freezer? (I did have a broken jar once when I put it directly into the ice.) Just go right in the fridge. If you forget the yogurt in the freezer, it’s fine. Yogurt can freeze! Just thaw in your fridge.
Note: Don’t get too interested in what it looks like until the yogurt is cold. I have a feeling stirring, and definitely shaking, the jars at this point hurts the process. - That’s it! You have created yogurt!
If this post overwhelms you, be sure to check out the Cliff’s notes picture tutorial HERE.
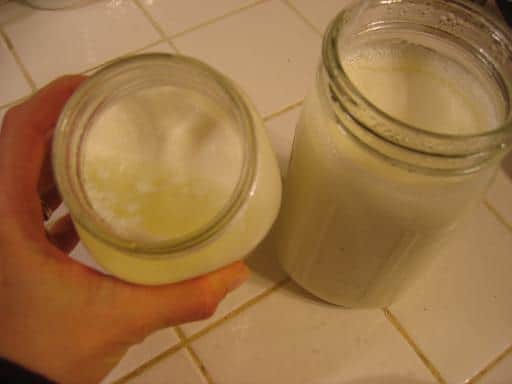
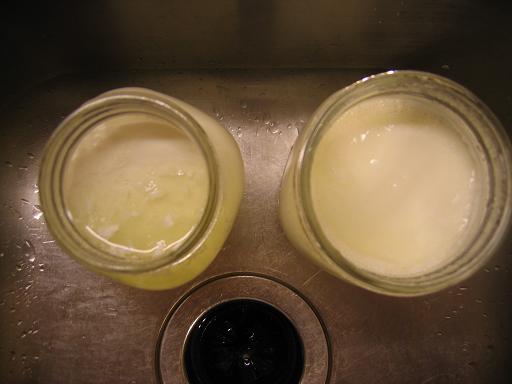
What Does It Look Like?
Most of the time, the finished product will have a yellowish “whey” around the thicker yogurt. This is normal! You can pour it off (into your soup, preferably – there’s protein in that whey!) or stir it in, depending on what consistency you want.
The Easy Clean Up
Lay out your towel to dry and use it for your showers. Air dry your pot and cooler and put them away. Your only “dishes” include a spoon and a thermometer (maybe). Nice!
When your yogurt is cooled and ready to eat, take out a few Tablespoons for a starter for your next batch. Store it in a clean container and date it (I use a glass baby food jar that has been through the dishwasher). Best practice is to take your starter out first so that it’s the least contaminated by folks dipping out yogurt throughout the week.
I’ve found that I can make a batch every one to two weeks or so and the starter is still plenty strong. I might buy a new starter at the store every two months. If my yogurt starts getting runny, especially twice in a row, I can solve it by buying a new starter.
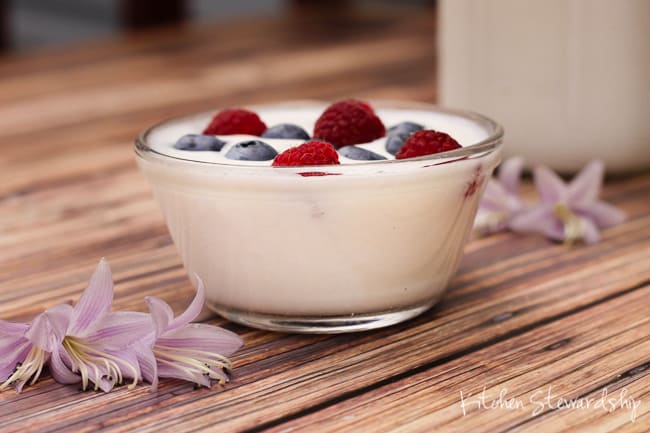
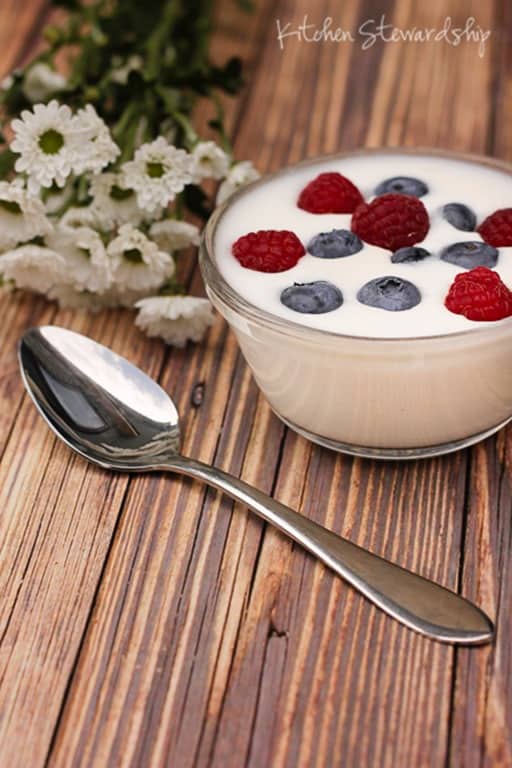
Serving Suggestions
Breakfast, Lunch and Snacks…We like the plain yogurt at our house with a bit of sugar (about a tsp per serving) or honey and frozen fruit. Yum-O! When I sweeten a whole quart, I use about ¼ c. sugar and 1 tsp. vanilla. Remember to stir gently – if you whip up your yogurt too hard, it will remain runny. Here are some ways I enjoy plain yogurt without any sweeteners.
Sour Cream Sub…Plain Yogurt can substitute in any recipe that calls for sour cream.
Smoothies…Add milk, fresh or frozen fruit, maybe a few ice cubes, and blend. A snack or a dessert! Green smoothies are all the rage right now. I use half yogurt and half milk with the fruit, and my boys think a frozen banana really makes it great!
Bake with it…you can use yogurt instead of milk in biscuits, cornbread, and pancakes. I also just read that you can replace some of the butter or oil in muffin or brownie recipes and all of the fat in cake mixes.
Dips and dressings…Add chopped cucumber and dill weed to plain yogurt and eat as a salad or with grilled meat. I’ll share some more recipes later in the week.
Yogurt definitely keeps well for two weeks, probably longer, but it does get more tart with age.
A Note on Skim vs. Whole Milk
For the first 3 years of my yogurt making, I used skim milk and added powdered dry milk to thicken it up. After doing more research on dairy, I’m pretty convinced that skim milk, which has powdered milk added to it anyway, is pretty bad for you. (Here’s the explanation of that: oxidized cholesterol). However, if you’re a dyed-in-the-wool low-fat/no-fat kind of person and are going to use skim milk, add this step:
At 110 degrees, pour about ¼ cup (just dump some in) nonfat dry milk into each jar. This has 3 purposes: added protein, added calcium, and it can thicken the finished product a bit.
Added bonus: if you do choose skim or reduced fat milk for the adults in your family but have a child under two who requires whole milk, you can make different versions at the same time. Just label the top of your jars.
A Note on Organic Milk
Organic yogurt is a great step toward health for your family. Pesticides, chemical fertilizers, hormones, etc. are found in higher concentrations in animal products because the animals eat lots of grains or plant products to produce that one gallon of milk or one pound of meat. When making your own yogurt, however, it’s not recommended to use “ultra-high-temperature” pasteurized milk (UHT), which applies to most organic milk, definitely that sold in cardboard cartons. Here is an explanation of why. If you have the money to buy organic milk, I’d highly recommend looking into getting it from a local farm. See www.realmilk.com for more.
Safety Notes
- Remember that you’re dealing with bacteria here and asking it to multiply on purpose. Be aware of introducing naughty bacteria into your milk/yogurt.
- While the milk is being sterilized, try to keep the inside of the lids out of the air (bacteria-city). I just put them facing each other on the counter.
- If your stirring spoon can come right out of the hot dishwasher, kudos to you. Some people put a spoon into a clean plastic bag when they take it out of the dishwasher if they know they’re making yogurt soon. Or, you can put it in the pot of boiling water and use tongs to get it out.
- Wash your hands well at every step!
- Think about where you set your candy thermometer while the milk is cooling if you need to use it to check for the 110 degrees.
Note: I have loosened up a lot over the years on my bacteria-consciousness. I still wash my hands before doing each step, but you ought to do that whenever you’re cooking anyway. Just keep things clean and don’t worry. This isn’t rocket science! You’ll know by the smell if the bacteria is wrong in the finished product.
Yogurt Troubleshooting
Why is my Homemade Yogurt Watery?
- Yogurt got too cool while incubating (bacteria inactive) I’m pretty sure this is not a big deal as long as the yogurt is at the proper temp for at least the first four hours.
- Milk too hot when starter stirred in (bacteria dies) This one is a deal breaker!
- Stirred too hard when introducing starter
- Weak starter – buy new yogurt at the store
- What to do with failure? There’s nothing wrong with runny yogurt. Stir in some unflavored gelatin (use the coupon KS10 for 10% off!) and use it anyway or be creative with runny half-milk, half-yogurt. Smoothies, anyone? Use it in baking like you would milk, or make cream of vegetable soup. If your yogurt incubated WAY too hot, it’s pretty much just milk. Make hot chocolate and try again tomorrow!
Why is my Homemade Yogurt Grainy?
- This is my most common problem. I really believe the freezer step helps guarantee a creamier consistency. I also think the precise temperature when you stir in the starter may make a difference here, but I haven’t pinpointed exactly how to make perfect yogurt every time. Also make sure you’re not overdoing the amount of starter. Just 2 Tbs! Sometimes just stirring gently will help out with this problem.
Why is my Homemade Yogurt Sour?
- Too much starter
- Incubated too hot or for too long for your taste
Why is my Homemade Yogurt Stinky?
- Introduced bad bacteria into yogurt, then let it multiply. Throw away this batch and be more careful next time!
Why do I Have Slimy Yogurt?
- This can also be from bad bacteria in the yogurt. Throw it away.
Need more help yogurt troubleshooting?
- Remember that there’s an online forum to “ask the teacher” in the Cultured Dairy & Cheese eCourse.
- Complete troubleshooting guide HERE.
Who Should Make Their Own Yogurt?
Best of luck to all of you! I’m convinced that everyone should make homemade yogurt, if you eat it at all. I used to think you had to be an at-home-mom or have time on the weekends, but now that I’ve successfully cultured 24-hour-yogurt, I really think anyone could do it, even if you work all day long. Just start the yogurt while you’re making dinner, add boiling water before bed and in the morning during breakfast, and remove the yogurt after work the next day. You could also just incubate overnight and put in the freezer in the morning. I have accidentally left yogurt in the freezer overnight with no negative repercussions. You can do this! It’s NOT rocket science, it’s just a little food science that anyone who can make chocolate chip cookies (and I barely can do that!) can handle.
You can also make it even easier, incubating on the countertop if you try a Cultures for Health starter.
Yogurt Excuses
I really, truly believe that everyone can and should make their own homemade yogurt. Even if I was really rich and didn’t care a whit about my food budget, I’d probably still make this item homemade, because I can do it better than the factories (nutrition-wise, at the least).
Lots of people are afraid of this one. Here are some common excuses and my straight-up responses:
- I work all day, and even though yogurt doesn’t take that long to make, the steps are all spread out. I can’t fit it in!
My response: You have two options to make homemade yogurt fit with your schedule. First, there’s always the weekend. I realize that’s not always possible, because sometimes weekends get awfully full, too. Second, if you start the process when you get home from work – let’s consider you a workaholic and it’s already 7 p.m. – you can put your jars into the cooler by 8:30 if you use the speedy cooling method and 10 p.m. at the latest if you let the milk cool on the counter. Incubate overnight, or even until you get home from work the next day (I prefer 16-20 hours, myself), and stick the jars in the fridge. Ta da! You’re done. Full-time work is no excuse. - I’m single/a student/no one in my house eats yogurt except me. I can’t make huge batches and just let it go to waste!
My response: This method is adaptable to any amount of yogurt that you can fit in a pot. I happen to make 4 jars (just less than a gallon) at a time, but my mom has just started making homemade yogurt using my method (way to go, Mom!) and makes just one jar at a time. You could make two cups if you wanted to. You decide the size and number of your jars. Anyone can make homemade yogurt! - I don’t have a picnic cooler, so I can’t use your nifty method to incubate.
My response: Lots of people also think they need a yogurt maker to make yogurt, but I think that investment is not worth your money or space in your house. You can incubate yogurt in any place that will stay at about 100 degrees F for 6-24 hours. Many people can use an oven with the light on (check your temperature – mine is probably not warm enough, but others say theirs gets up to 140-150F!). You could also try wrapping the jars in towels with a hot water bottle(s) or even an electric heating pad. Some have had great luck with a slow cooker filled with water and kept on low with the lid off, and a friend of mine simply leaves the jars in her pot of water on the stove. You’ll have to check the temp the first few times you make yogurt, but once you understand the science of growing bacteria you can handle about any situation. Once I incubated yogurt all day in the sun on my back porch, then overnight in a warm car. It made the creamiest raw milk yogurt ever! You do not need fancy equipment to make homemade yogurt. - I don’t know where to buy yogurt starter/cultures.
My response: Trust me, any grocery store has some sort of plain yogurt for sale. Any plain yogurt will do, as long as it lists “live and active cultures” on the side (and I have yet to find one that didn’t). I’ve used Meijer brand, Dannon, and Fage Greek yogurt. If you can only find vanilla, give it a shot! Only fat-free? You’re using whole milk anyway (right???), so the fat free portion of the finished yogurt is so small it’s insignificant. You do not need fancy starters to make homemade yogurt. - I use coupons, so I don’t need to make homemade yogurt to save money.
My response: There are still two other reasons to make your own, and I bet in the long run it will still save you money. First, your family’s nutrition. Incubating your yogurt longer than 4 hours will decrease the milk sugars and increase the probiotics in the final product, which you can’t say about store yogurt. You also will avoid all sweeteners and other junk that might be added to the yogurt cups that are on sale with a coupon. Lastly, your family will eat more yogurt when you have it available in bulk, I guarantee it. More yogurt consumed = a healthier family. The second reason to make your own is to avoid wasting all those little (or big) plastic yogurt tubs. Making homemade achieves that in a big way. You save a lot more than money when you make your own. - Will you come to my house and show me how? I think if I see if done just once, I will believe I can do it myself!
Sure, I can do that…sort of. If you’re a really visual person (or a really nervous one), I will be presenting my method and all my thoughts on and love for homemade yogurt as part of the GNOWFGLINS eCourse on cultured dairy and basic cheesemaking, starting in February. My guest lecture is in March (note to self: tape yogurt making!), and you can access it at any time with any level of membership once it’s posted. You can check out the cultured dairy schedule HERE by scrolling down to the course description and clicking through for more info. As a side note, the “thank you video” for this month features my kids and I making Farmer’s Cheese, an unbelievably simple recipe and very cool science experiment. My kids are hilarious, and Paul had a great time explaining some of the process (trust me, you’ll laugh at his antics).
[question]Are you ready to make homemade yogurt? Is something holding you back?[/question]
For more great ideas for the kitchen and balancing your nutrition, budget and earth, see these links:
- Throw Away Less Food
- Connected Meal Planning
- How to Make Homemade Chicken Stock
- Intro to Super Foods Series
- How to Use More Beans
[redbox]
Need More Baby Steps?

Here at Kitchen Stewardship, we’ve always been all about the baby steps. But if you’re just starting your real food and natural living journey, sifting through all that we’ve shared here over the years can be totally overwhelming.
That’s why we took the best 10 rookie “Monday Missions” that used to post once a week and got them all spruced up to send to your inbox – once a week on Mondays, so you can learn to be a kitchen steward one baby step at a time, in a doable sequence.
Sign up to get weekly challenges and teaching on key topics like meal planning, homemade foods that save the budget (and don’t take too much time), what to cut out of your pantry, and more.
[/redbox]


Love this post! Haven’t made my own yogurt for a while but when I did, it was using the cooler method. Work happened and it was something I just didn’t make all those years. Now I’m home most of the time and focusing on healthier, homemade foods again. Hate flavored yogurts so I have been buying plain and adding fruits, nuts, etc., if I eat it as a snack. One of our local grocers sold an organic maple flavored whole milk yogurt. Was curious so had to try it. Not bad, so I started drizzling a little locally made maple syrup as another option. Yum! Recently learned of a local country store that sells raw whole milk. After reading this post, think I have to go check out the store and try making my own again, and trying the different methods. BTW – homemade sour cream is to die for. It is quick to make. The first time I made a batch, I could have sat down and ate every bit of it right out of the jar I soured it in. No more store bought for me. 🙂
Hi Carol!
Thanks for sharing your tips! We’re so glad you enjoyed the post!
Put a lid on your pot of boiling water and arrange the towel in the cooler so you can put the pot in there without melting anything, then close the lid, towel and all.
*So you mean put the whole pot with jars in the cooler?
Get those lids on again and nestle your jars in the cooler. Keep them wrapped in one half of the towel and take the lid off the pot to let the heat out, then close the lid.
*So your talking about the jars in the pot in the cooler?
You remove the jars to let them cool on the counter and then put the pot in the cooler to heat the cooler. Then you put the jars into the cooler next to the pot. Look at this post with pictures for each step and it will make much more sense! https://staging.kitchenstewardship.com/making-homemade-yogurt-easy-picture-tutorial/
Is there an easy way to print this article? I’m trying to make a binder of all good homemaking processes. I don’t see a “Print this” anywhere! Thank you!!!
Sorry Mindy, only the actual “recipes” end up with the print button – copying and pasting into a Word doc and then printing is the best way.
Pingback: 7 Kitchen Appliances You Don't Really Need - The Humbled Homemaker
Could you provide a picture of the candy thermometer, or tell us which brand you use? My thermometer clip doesn’t hold, and my yogurt never gets all the way up to 185 despite all efforts.
Elaine,
I’m not sure I even have it anymore – it was just cheap. Any meat thermometer will do – I use my digital one for spot checks now but mostly just use my wrist. 🙂 Katie
I have tried and failed to make yogurt soooo many times 🙁 One time it seperated.Most times it seems to go bad and not become yogurt at all. Just milk with some thicker bits in. I can’t get raw milk here so I was using whole milk and an organic plain yogurt as the starter.One time it came out lumpy so I strained it and got curd cheese and lots of whey.Why does my yogurt not work???
Kasia,
How frustrating! I’m so sorry… 🙁
The two most common reasons for failure are incorrect temperature or too much yogurt starter added.
Make sure you’re only adding 2 Tbs. plain yogurt to a whole quart (4c) of milk. Some recipes call for 1/4 c. or even a half cup for a quart of milk, but that’s way too much.
Then make sure your jars stay at about 100-110F, no higher, during the whole incubation period. If I were you, I’d start with 4 hours so you have less margin for error on the temp changing. Check the temp of the milk in one jar after 30 mins, quickly, to make sure it’s still in range. Then check again at 2 hours and again at 4 hours just before you refrigerate, so you know for next time that your method of incubating works (I really like the cooler system myself). You’ll lose *some* heat doing this, so work quickly so your testing doesn’t change the environment too much, but after once or twice getting it right, then you’ll be able to trust your incubation and just let it go. I sure hope that helps!!!! Good luck! 🙂 Katie
I think it was actually both-I think I put too much starter in and I think the container got too cold(I was making it in an easiyo container)or the milk was too warm(no thermometer).I shall be brave and try again soon.Thank you so much for inspiring me 🙂
So…I tried this by pasteurizing raw milk (I know, what’s the point, right?)…anyway, as I brought the milk up to 180 it began to seperate in the pot. (confession: the raw milk was pretty old) and I stirred it up and continued, but when I got up this morning looking forward to fresh yogurt for breakfast, all the jars (I have an incubator with small jars) had a little solid at the bottom and a LOT of whey on top. Curious what could be the problem?
HI Gary,
Old milk isn’t nearly as friendly to yogurt as fresher milk, so it depends on *how* old it was (over a week?)…but really, the separation there sounds a lot like when I added too much yogurt starter. See pics here and see if that helps troubleshoot (pardon the delay on the answers!) — http://staging.kitchenstewardship.com/recipes/raw-milk-yogurt-escapades/ (and you can also make raw milk yogurt without bringing it up to 180F, it’s just a little more sensitive and takes some TLC – here’s a new way to get it thick – http://staging.kitchenstewardship.com/2012/05/30/how-to-make-perfect-thick-creamy-raw-milk-yogurt-plus-how-to-fail-miserably-and-laugh-at-yourself/
🙂 Katie
You can also use half and half if you want homemade sour cream, the same method is used, only with the half and half.
Thank you for the canner pot method for heating the milk, although you can just boil the milk while stirring constantly- it can take 20 minutes that way, so the canning pot with water ismuch easier.
For a single quart jar of yogurt, I found that after cooling to 112 degrees Fahrenheit (a quart size canning jar takes about two to three hours on the counter to cool) Stir in the culture. Wrap it in three layers of towels and leave it overnight. I get perfect yogurt every time with no special equipment. The key is to insulate it so that the milk cools very slowly after the culture is added.
Pingback: How to Make Yogurt — Eating Rules
I love plain Fage yogurt for a starter. Unlike Dannon, it’s just milk and 5-6 bacterial strains. 🙂
Pingback: How to Freeze Food in Glass Jars | Green Your Way
Hi! I’m new to your site while I was searching about yogurt. We are big yogurt eaters at our house. My mom (who lives in Florida) has made homemade yogurt since I can remember. Her method (the same that I use) is pouring a gallon of whole milk into a big enough stainless steel pot and heat until almost boiled. Then, she’d let it cool at room temperature and turn on the oven light. She’d then use a starter from the previous yogurt, add it in and give it a quick mix. She’d leave it uncovered and put it into the oven overnight.
I recently moved to upstate New York. I make yogurt about once or twice a week using her method. Recently though, my yogurt has been coming out very jello-like, whereas it used to be creamy. Before refrigerating, the whey is water like. After, though, it is very gooey and doesn’t separate from the yogurt.
I’ve bought the milk from different companies, but no luck. I’ve also tried adding about a liter of water to the milk before heating and although the yogurt doesn’t come out as thick, the whey is still gooey.
What am I doing/not doing?
Aneesa,
I wish I could help – but I’ve never had gooey whey! I would use a thermometer and check your oven temp as that can vary a TON from oven to oven – some lights are too hot to incubate it at all, although that doesn’t sound like the case for you.
Hope you figure it out! 🙂 Katie
Katie, I’m starting our journey into using healthier milk. I’ve read several of your post on milk and yogurt. What is the best milk you recommend for making yogurt? I always make my yogurt in the crockpot and love the ease of it. Thank you for sharing your real food journey and your information.
Katie,
I would always use whole milk, the best quality you can afford (as far as organic, raw, whatever) but never UHT pasteurized. I’ve made yogurt with skim (yuck, added powdered milk, yuck) and whole conventional milk and raw organic milk. Always yummy! 🙂 Katie
Love the detail in this post! My mother made yogurt when I was little and I’ve continued through the years. It is second nature to me, so I’ve never thought it through as carefully as you.
Like you, I eschew a yogurt maker. I make it on nights I use the oven and put the cultured jars in the oven overnight using the residual heat (no more than 150F) of the oven with the oven light on to keep it warm. To ensure a constant temperature, I put the cultured jars into my biggest heaviest dutch oven and fill the dutch oven with 120F water. That is the temp of the water from my hot water tap. The water insulates the jars from the heat of the oven and the heat of the oven keeps the water warm. Easy!
By morning, the jars will have cooled to about 95F. I leave them on the counter while we eat breakfast, then put them in the fridge before leaving for work.
Forgot to mention that I sometimes strain the yogurt to separate out Greek style yogurt when I need lots of whey. I simply line the basket of my salad spinner with a clean butter cloth or flour sack dishtowel and dump the yogurt into that right out of the oven. I pour off the whey in the bottom after breakfast, then put both the salad spinner and the whey into the fridge. When I get home from work, the towel contains thick yogurt and the base contains more whey. Scrape the yogurt into containers, add the whey to that you collected in the morning and refrigerate both.
What do you think of opening a probiotic capsule and adding the contents to the milk instead of the yogurt starter?
Thanks for your efforts here!
Hi deb,
You might want to review what I have found out about probiotics and yogurt-making on my website: mryogurt.info/probiotics
One time I used a capsule that I later found to have yeast in it…. bubbly yogurt!
My first objective in making yogurt is to actually make yogurt… so anytime I am adding something like probiotic cultures, I always add some regular culture so at least I know I have a chance of coming up with yogurt as a result and it always work.
So, deb, go ahead and use a capsule or three but with your regular culture.
Good luck and let us know how things turn out.
Pingback: » Positively Presidential Yogurt
Can I heat the milk to temperature on my woodstove? Or is bringing the water to boil then turning it down a necessity?
Amanda, You can use whatever means necessary to bring the milk to temp. 🙂 Katie
How do you know which of the 5 reasons given for the yogurt being too runny is the reason for it turning out runny? In one of the reasons, you say it is a “deal-breaker”… meaning it needs to be thrown away??? What if that’s why, how do you tell?
Lisa,
First, the “deal breaker” just meant that you don’t have yogurt at all, just milk. You can use the milk for cooking or baking, most likely, as long as it smells okay.
You might need to guess and check to really figure it out. If your jars felt cool when you got them out of the cooler, maybe the temp was too low. If you buy new starter and everything gets better, it was the starter. Once you practice a few times, it gets much easier!
🙂 Katie
Pingback: Basics: Easiest Homemade Thick and Creamy Yogurt Ever « familynaturally
Wow! What a ton of information!! Have you considered doing a condensed version, so that I could put this recipe on a card in my file? If it is so simple, why not keep it simple 😉
Here is a simple recipe (even simpler if you do not add sugar or salt):
Simple Homemade Yogurt
1 gal milk
1 cup sugar; amt used optional
1 tsp salt; amt used optional
1 tbsp starter – yogurt; brand optional
Heat milk to 180F in large soup kettle or slow cooker.
Mix in sugar and salt.
Pour into 4 quart jars to sterilize.
Pour back into kettle.
Cool to 120F.
Mix part in blender with starter.
Mix back into kettle stirring well.
Strain into sterile jars (from above)
Incubate by method of choice. (Yogurt maker; insulated cooler, whatever)
———————————————
The recipe takes about 15 minutes prep time, not counting the slow cooker time to heat to 180F.
I use a yogurt maker which I have adapted to hold 4 wide mouth quart jars which leave a space between the top and base so I just throw a towel over it to keep the heat in. After 8 hours – perfect yogurt every time!
one point that might help. when adding the starter (already made yogurt), take about 1/4 to 1/2 cup of the scalded milk out and stir the starter into that, being sure to blend it very well, then reintroduce that mixture to the pan of milk.
i come for several generations of yogurt makers and we have perfected this over those generations. unlike making mozzarella, for instance, at home where the cost of milk makes the cost of cheese as high as in the store, home made yogurt is a great money saver. we like it tart and i use it in my smoothie for breakfast every morning. we use it for meals and snacks every day. try adding some mashed fruit and a tablespoon or so of sunflower seeds blended with a tablespoon of organic peanut butter for a tasty, filling snack.
Hi! I am so excited about making my own yogurt this way. I got a “yogurt maker” appliance for christmas, but it only makes 42 ounces at a time. I am making yogurt every time i turn around! One question I have, and this may have been already asked in the comments, (but I got tired of reading them) can I just boil the milk in a pan, pour it in a pitcher, then mix in starter THEN pour into jars? It seems tricky to boil it already in the jars. Plus, not sure I have the appropriate pan. Thanks in advance!
Amy, Sorry I missed your comment for so long! You bet, you can do what you said – although if it were me, I’d cool the milk and add the starter in the pan, then pour into jars, skipping the pitcher. 🙂 Katie
Yes, you can boil the milk in a pan- stir constantly until it comes to a boil (the tradition was to boil and stir for 20 minutes). Before pouring in the hot milk, warm up jar with hot water. Let the milk cool to 112, add the culture into the jar. Wrap it up and let it sit in a warm place for 8 hours or so. This works well with a 1 quart canning jars. Smaller jars will need a heat source to extend the warmth. Instead of wrapping. put your smaller jars into a crock pot with 112 degree water surrounding and let that cool slowly overnight, that would work perfectly too.
I have been using this recipe for making yogurt for over a year, and I love how the yogurt comes out. My biggest problem is that my quart jars keep cracking and breaking during the process, and I’m wondering what I’m doing wrong, since I don’t see anyone else posting about that. For instance, tonight when I lifted the jars of 185-degree milk out of the kettle, the bottom of one fell right off. I’ve lost at least 6 jars this way. Any ideas at all? Thanks!
Hi Jen, I’m just going to make a guess here. Do you set your jars on a rack in your pot. I don’t think you have to, but maybe this would help. Are your jars all new? I think old jar tend to break. Maybe your heat is too high. You could also try a heavier bottomed pot. I hope someone has the right answer for you. My friend was always breaking the bottom of her jars when she canned and I think it was because she didn’t use a rack so that the water could flow around the jars.
Jen,
That does happen to me sometimes, or at least it did – first, make sure you’ve at least got a washcloth underneath each jar. Second, and here’s what made a huge difference for me – only add cold water to the pot. A reader hypothesized that adding hot water was too quick of a temperature change, and it’s been quite a number of months now for me, old jars and everything, and no breaks. So if you use warm or hot water from the tap, try cold! Good luck!!
🙂 Katie
Jen,
I totally thought I had the answer with the cold water thing, and then I broke a jar just yesterday! Arg! It’s SO frustrating. I wonder if the other commenter has the real trick, that you have to have some circulation underneath. (My water didn’t even come to a rolling boil, not even close, so I was really perplexed.) Maybe 2 washcloths for me next time to make sure there’s enough thickness under there…
🙂 Katie
Hi Katie .What a great post. I have a quick question .Can I use plastic jars after mayo or need to be glass jars?Love your blog by the way.Lots of great info 🙂
Anna,
Definitely no plastic jars in boiling water – you’ll want to stick with glass!
🙂 Katie
Yogurt will not culture at temperature much over 120F. During Hurricane Sandy, I made a gallon of yogurt with my yogurt maker – it keeps the temperature around 120F. It came out perfectly.
At 200F you cooked the yogurt and not cultured it. You might want to try again using a lower temperature and more yogurt culture to start it with.
I am dumb as dirt when I try to regulate the temperature of the yogurt culture myself which is why I got a yogurt maker. So in over almost 2 years or so of making a gallon of yogurt a week or more, I have had no failures. That’s over 100 gallons of yogurt – my wife and I eat a lot of it in smoothies and turning half of it into Greek yogurt by straining it.
Good luck and let us hear back from you on your second attempt?
Bill
My house is 63 degrees and I put the yogurt in the oven at 200. My yogurt didn’t take, can I start over again with the same milk and any suggestions
Elaine,
Honestly, this really depends on how long your milk was in there. Are you saying you kept the oven at 200F? That’s way too hot, so that’s why your yogurt didn’t take. It also probably depends on whether your milk was raw or not. Trust your nose…
Good luck! 🙂 Katie
After adding the culture, the milk should not be heated up again- 112 dgrees F. is the ideal temperature.
Just wrap it in several layers of towels, and leave it out in a warm house for eight hours. You can leave it wrapped up in the oven if you have a pilot light, but don’t you don’t need to turn the oven on. It can cool slowly after adding the culture, there is no need to keep it at 112 degrees. I used to leave my starter on top of my jar as it cooled on the counter, so the temperature evens out less shock to your starter than when added cold to the warm milk. This is the old world method- Madzoon (Armenian for Yogurt)